
Let’s just get this out of the way first up shall we? I am not a Tilly fan but her Miette wrap skirt pattern is cute, if not very original, and it was easier (and faster and cheaper and…well you get my point) to print off a copy then try to draft my own, or to obtain or grade any of the many similar vintage patterns that eBay wanted to sell me.
I grabbed this bolt from the sale table and while waiting in line the fabric whispered to me.
There is often a lot of waiting in line time when shopping at Spotlight, I usually spend it dream sewing.
Anyway, fabric doesn’t always have a strong opinion on the subject of pattern selection but these birds were most insistent, they would be a wrap skirt.
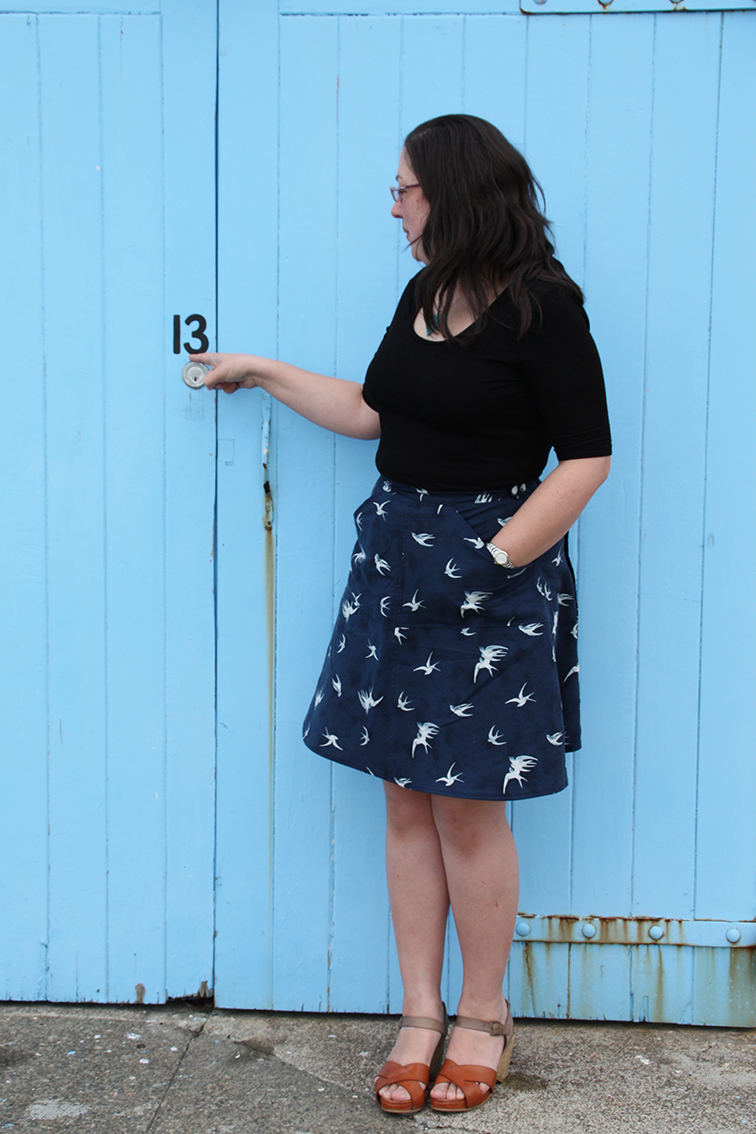
I bought the last 1.9 meters left on the bolt but I managed to cut the skirt out of that easy. The instructions I printed off didn’t have a cutting layout and I didn’t bother to look up the online tutorial but I had enough left over to have cut out the ties that I omitted if I’d wanted to.
I cut a size 5, the second-to-largest size (!), and as mentioned I left off the ties because, while they add more cuteness, they also limit the skirt to tucked in tops and I have only seen a few versions where the ties didn’t stick out awkwardly.
You are meant to cut three sets of the waistband piece. So I cut one set of waistbands as patterned, for the centre, then 2 more sets with an extra 4cms of length added, for the side/back. This extends the tabs each side, leaving me more room for two buttonholes.
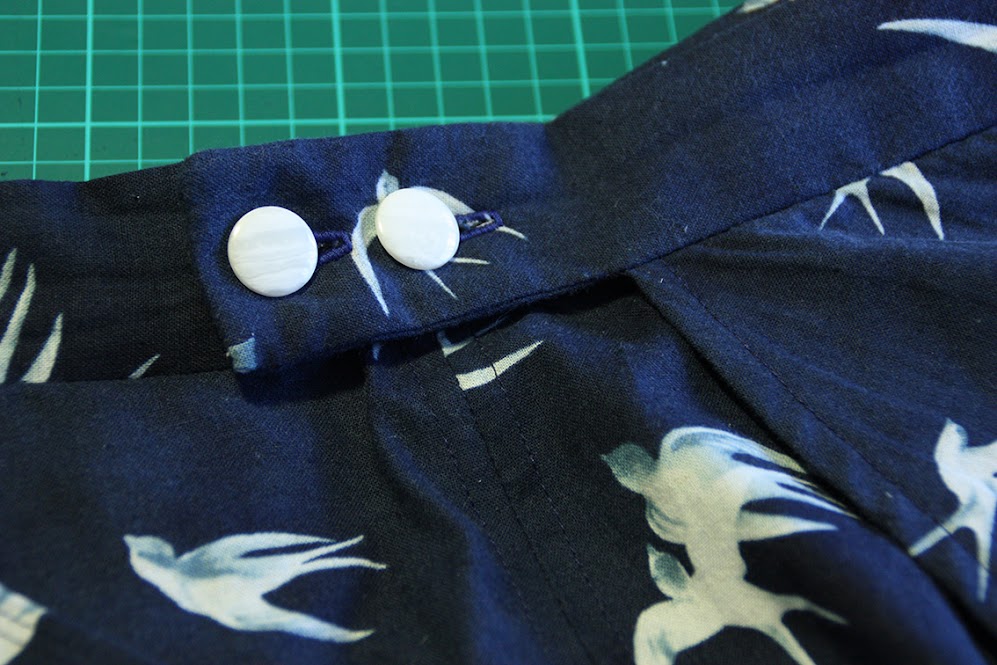
I stitched my button holes first and then tried the skirt on to mark where the buttons should go.
I also intended to omit the front pocket because I thought combined with the wrap skirt they might make the whole thing a bit aprony.
Aprony is a word.
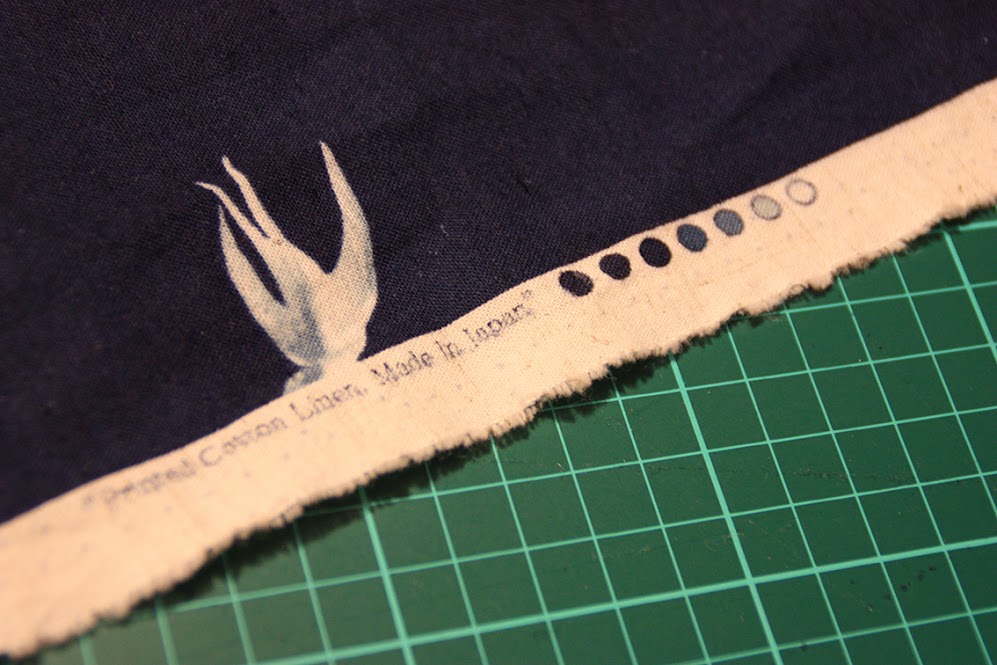
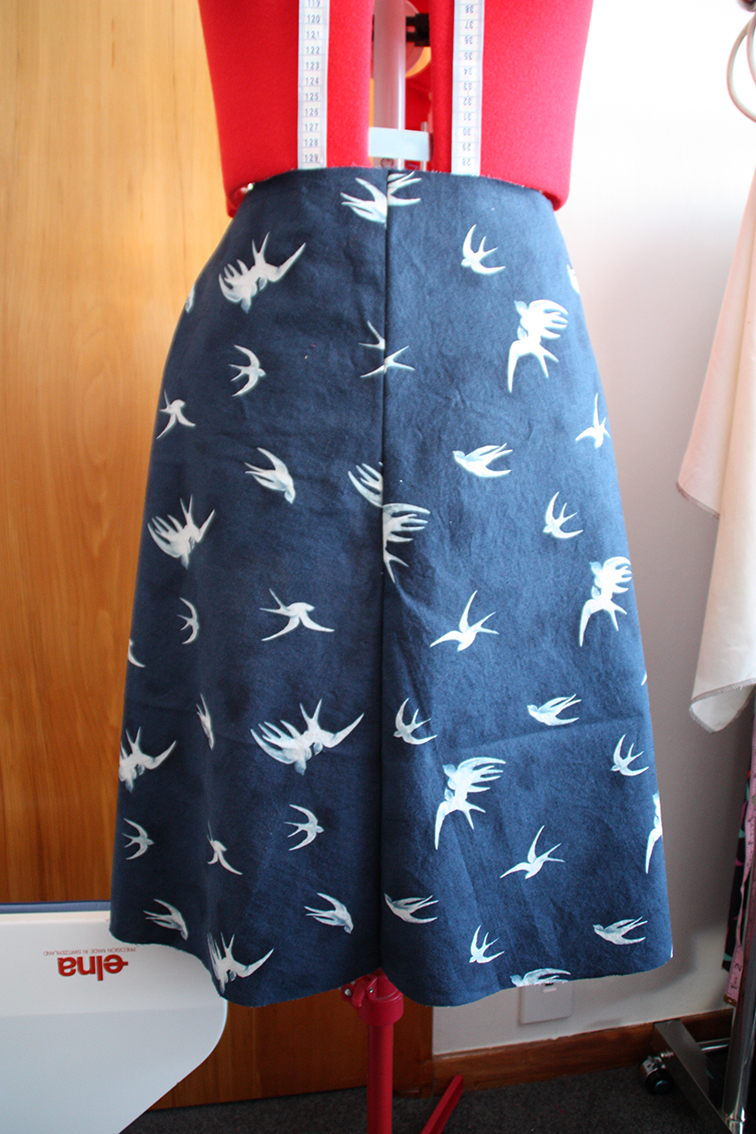
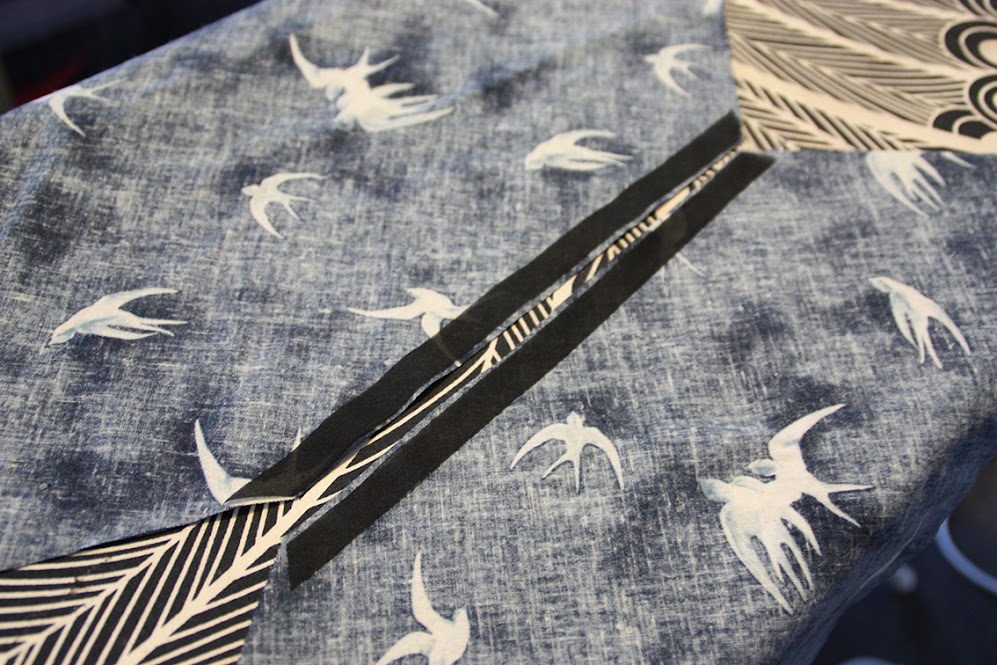
I knew I’d end up decapitating some birds while cutting out as it was impossible to run all the seam lines between them. What I didn’t count on was accidentally decapitating TWO sets of birds each side of the centre front seam in such a way as to make them look like they’d flow right into each other.
This produced one small white star shape directly over my navel…and another larger white star, err, slightly lower…you get my drift.
So there was some unpicking and the pocket pattern piece was located and cut and attached to hide my cutting sins.
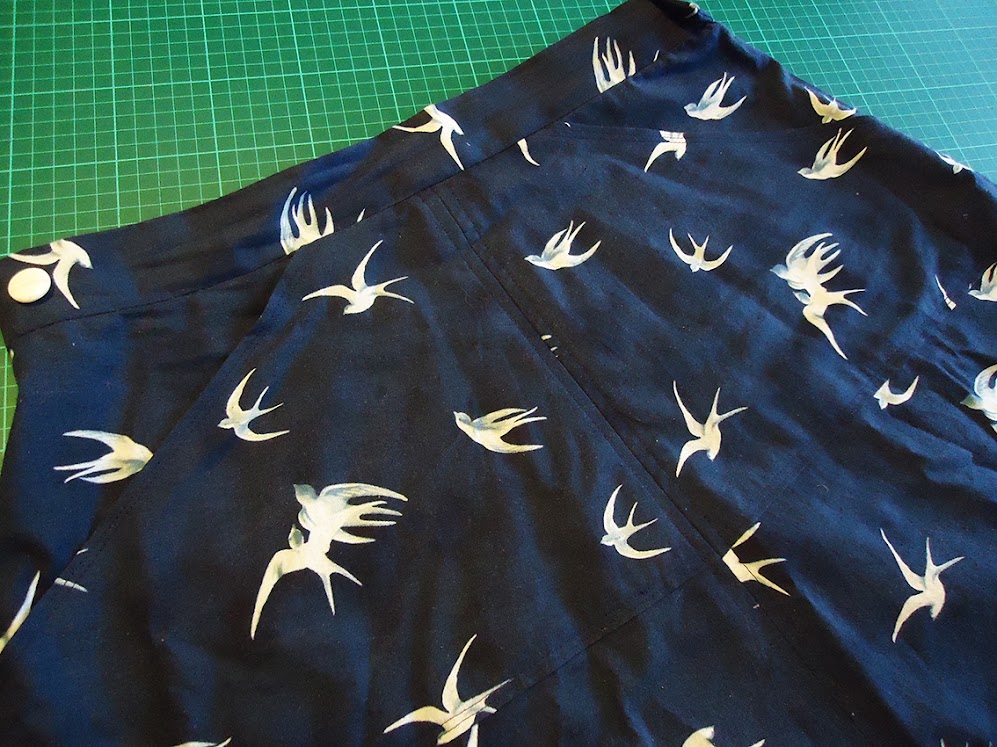
It’s useful so we’ll say that I did it on purpose, ok?
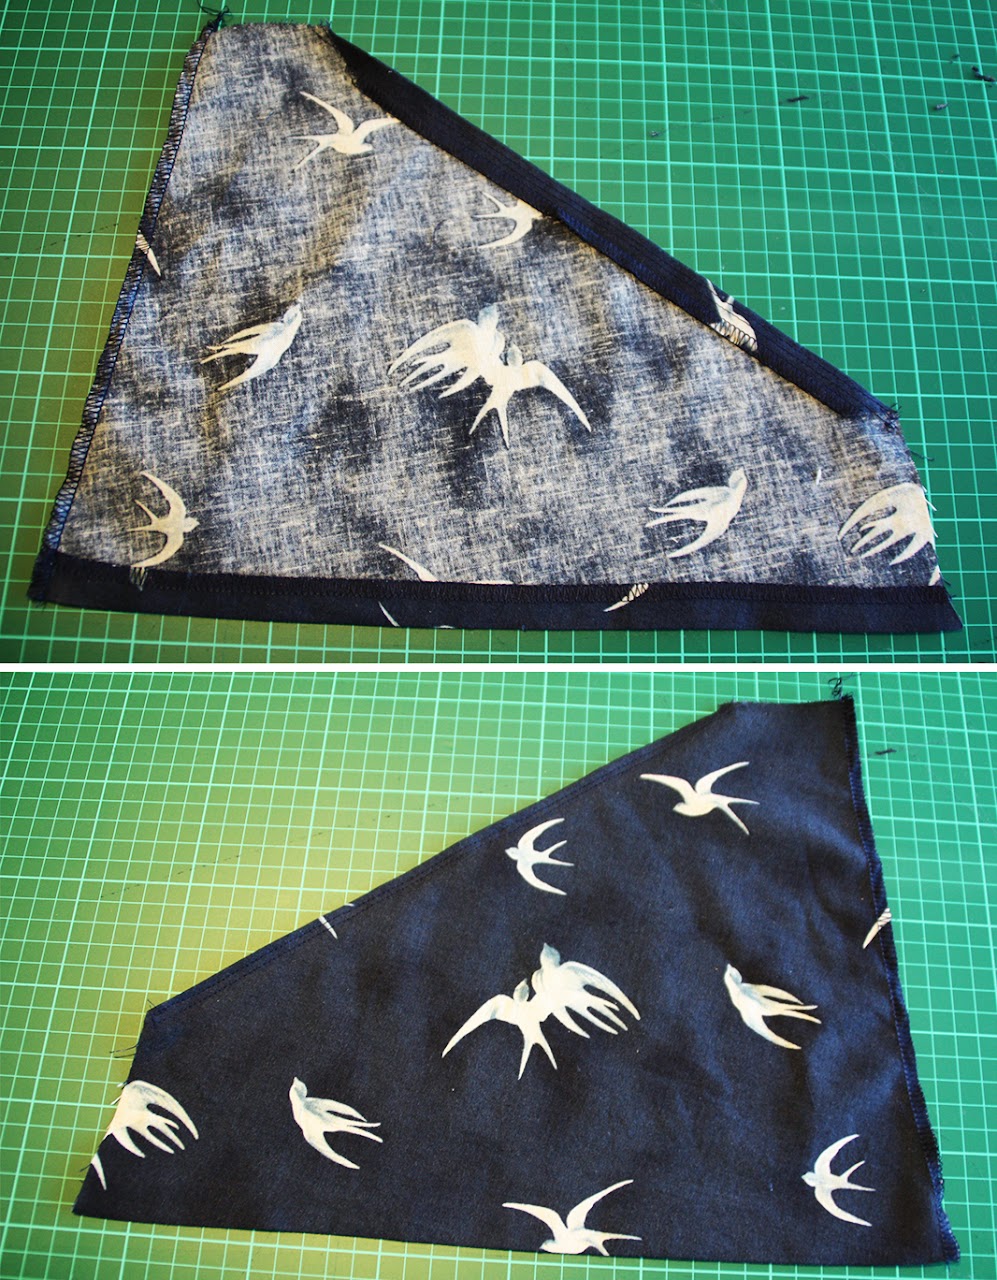
After that little mishap it stitched up really quickly, all overlocked on the inside with the vertical seams pressed open and top stitched down either side. I applied fusible stay tape to the open back edges of the skirt to stop any potential wavy edges and also to the pocket openings to prevent stretch induced gape.
I really only glanced at the instructions but there are a couple of things to note that I did differently:
- I pressed the bottom edge of my waistband up before attaching it to the skirt at step 7, this just makes it easier later on.
- When attaching the waistband I ignored “roll in a couple of mm so it doesn’t show in the outside” and I under-stitched the seam allowance at the top of the waistband to the facing instead. Pulling the inside edge of the waistband down will distort the top edge and what happens at the bottom outside edges where you joined the waistband to the facing before turning it? It’s going to get puckered. Under-stitching is the correct technique and will permanently stop it from rolling out and it’s also a good trick to keep up your sleeve for all facings and flappy bits.
I top stitched either side of the waistband opening to close it off so that it’s easier to thread the waistband end through.
I can’t remember what I did with the length – I think I trimmed some off and then did a simple 1cm-1cm double fold hem, top stitched.
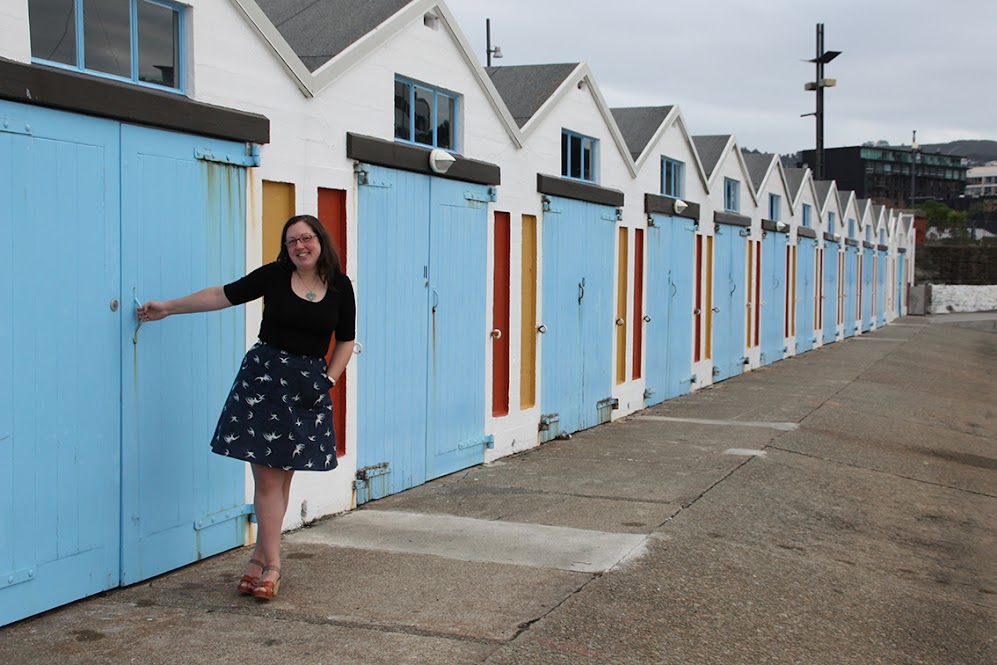
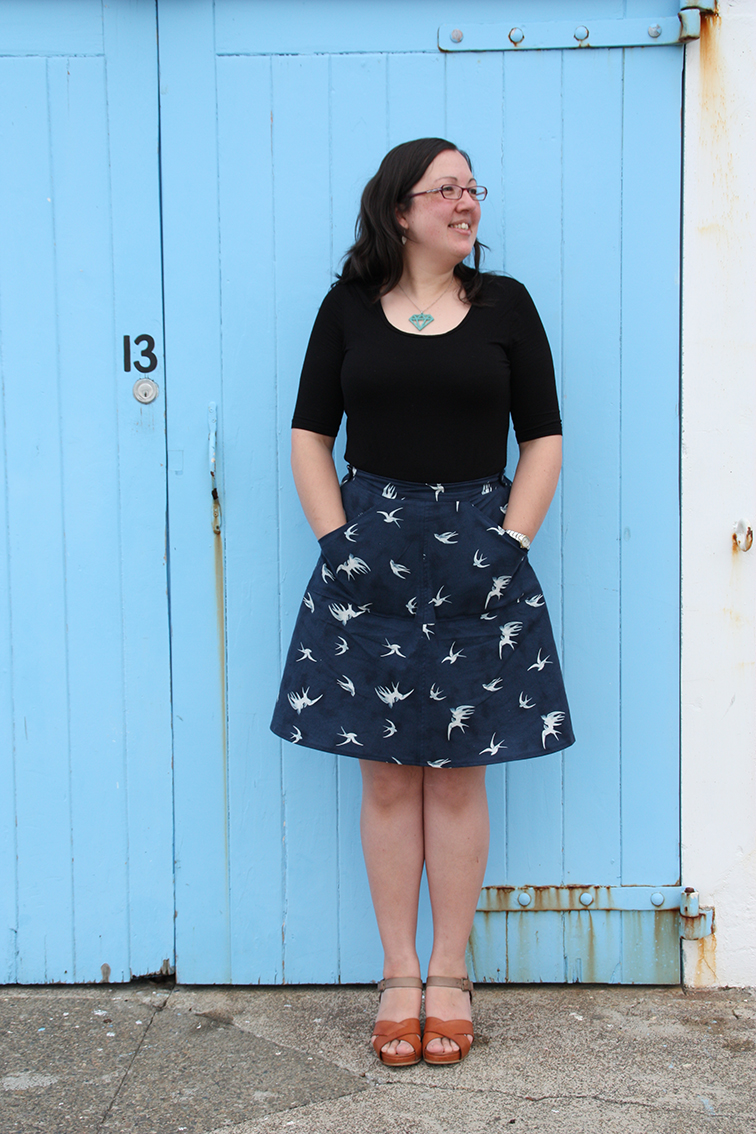
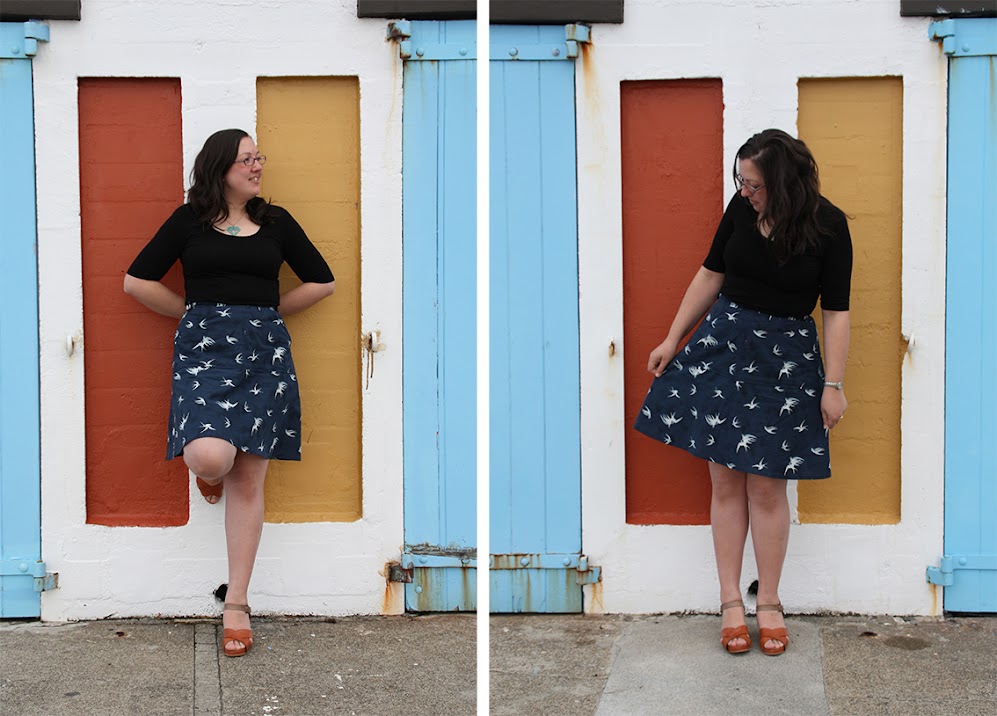
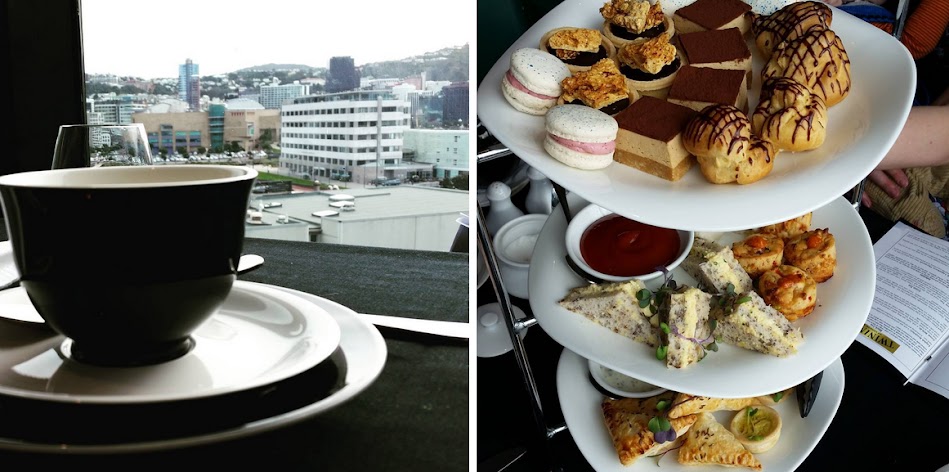
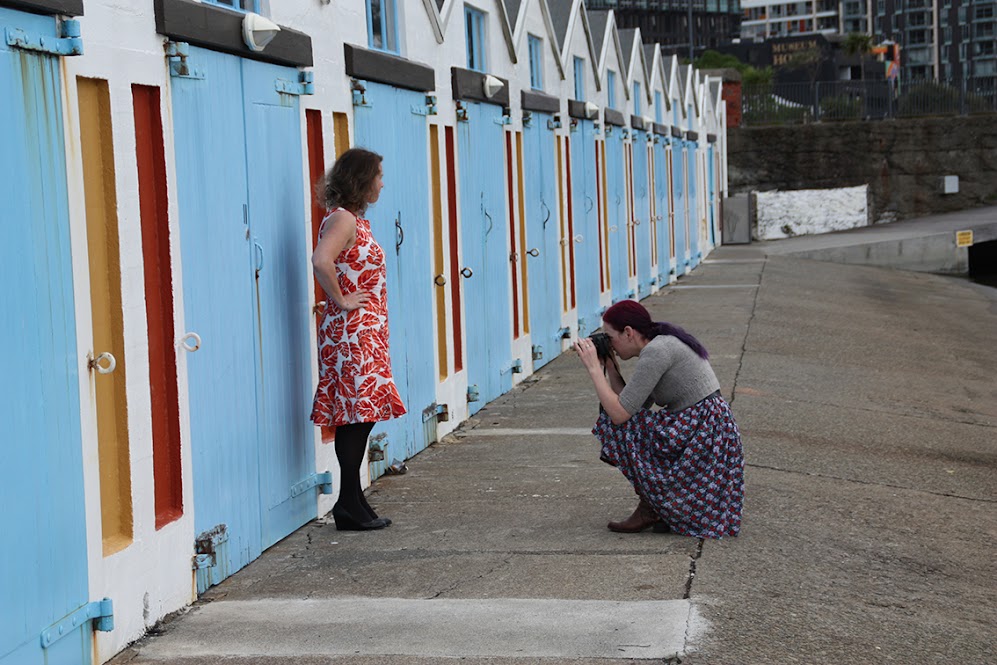
Big thanks to Kat for playing photographer and helping me get my photo-mojo back. We were in the city for a scrummy ladies lunch in Oriental Parade and afterwards we waddled over to the boat sheds at Clyde Quay for pics.
Here’s a sneaky peek at Nikki’s photo shoot 😉
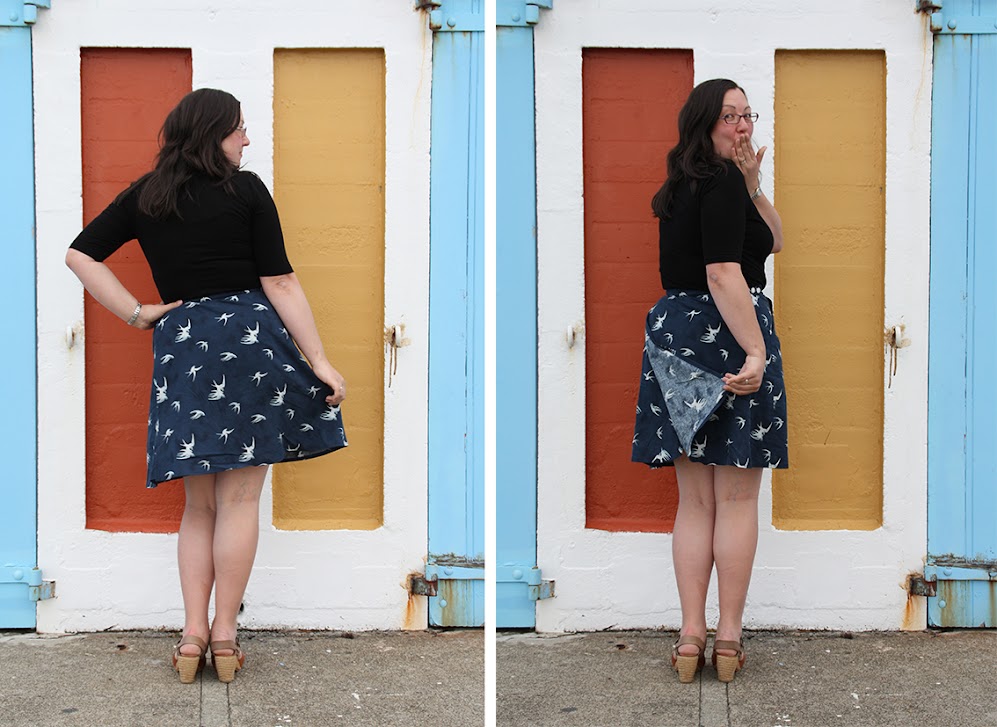
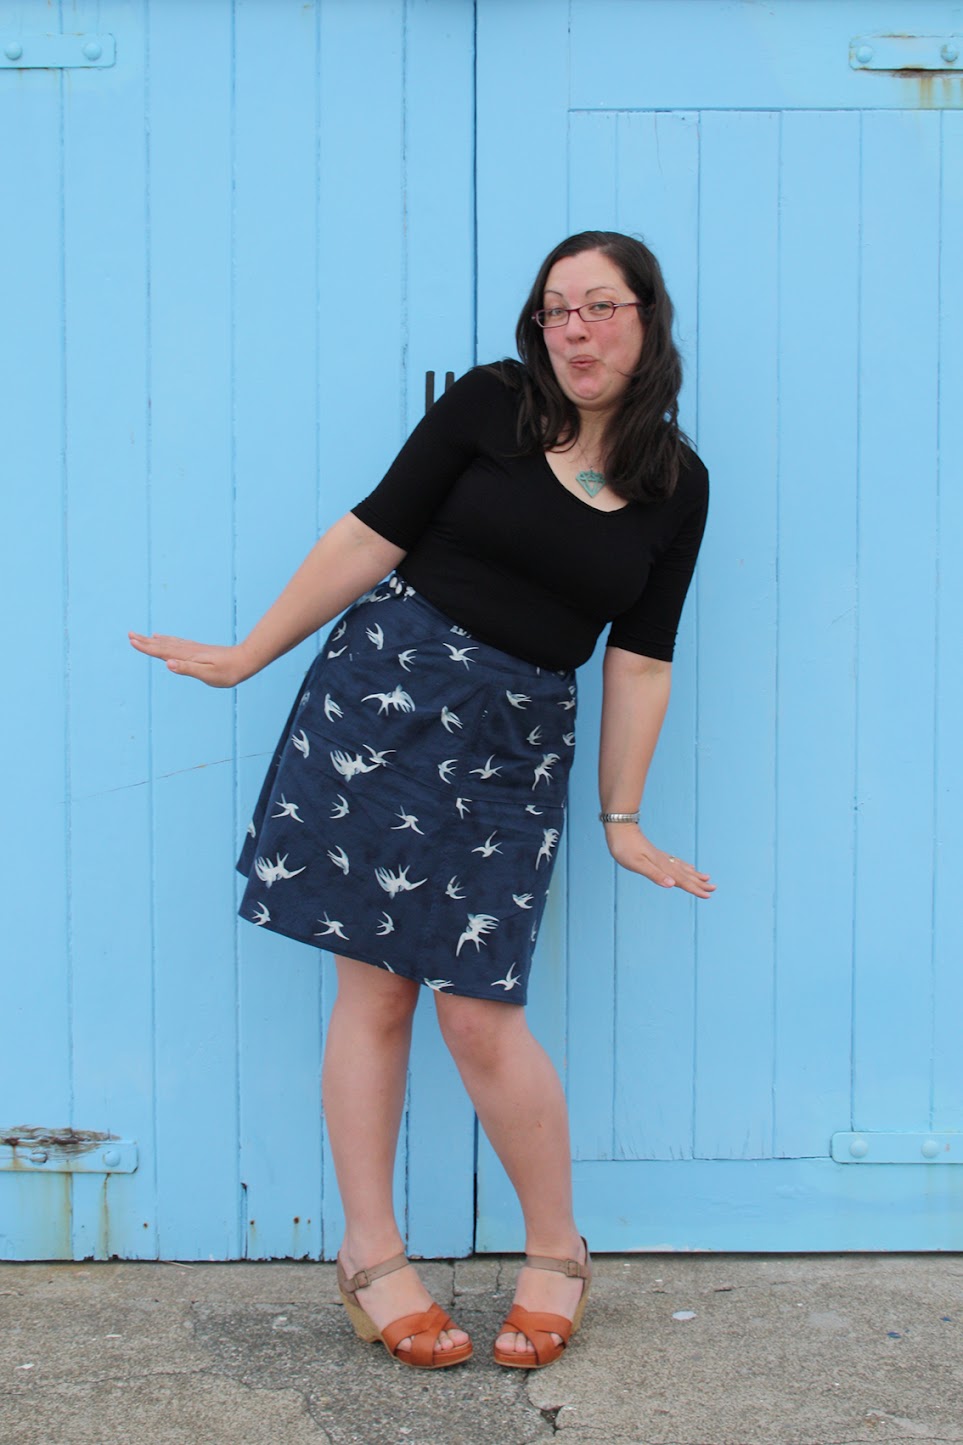
So, back to the skirt: I really like the A-line silhouette, the pockets turned out to be very useful so I’m glad I added them and it’s a really easy make with minimal fitting .
I’ll probably make it again…with less decapitation.

THE DEETS:
Pattern – Tilly and the Buttons Miette skirt, size 5
Omitted the ties, extended waistband 4cm both sides.
Next time I’ll extend an extra 4cms (8cms total) as it’s a tiny bit tight.
Fabrics – 1.9m printed Japanese cotton linen from Spotlight, $8.00/m


Pingback: How did the judges go? | The Monthly Stitch
Lovely skirt, and ooooohhhh that fabric makes me go weak at the knees! That is a great find, especially out of Snotties. Beautiful.
I too echo your sentiments on Tilly, she certainly has her place and has done wonders to help beginning sewists, so great, but her patterns are uninspired re-hashes of the 70s. But again, kudos to her for great marketing, her brand definitely works!
That said, I also think the Miette skirt is pretty cute sans ties and yours is lovely. Sorry so many birds were harmed in the making!!
I completely agree – her brand is strong and the more new sewists we can convert to our cause the better the blog reading and inspiration 😉 Thanks Lizzie
On Tue, Jul 21, 2015 at 10:11 PM, the curious kiwi wrote:
>
She’s back! Alright, admittedly you never actually left. But it feels like you’re really back!
Love the fabric. What a find! And now that you’ve done that cheeky little flap-up pic at the end, I can’t help thinking that a lining could be kinda fun.
Aprony is a word.
Awesome fabric and nice save with the pockets… And you are definitely not the only one who feels baffled…
I just adore the fabric. Spotlight surprises me sometimes! 🙂
This fabric is perfect and the skirt is so lovely. Fit very well in your body! 🙂
This is a lovely skirt. Good save with the pocket! I also appreciate the honesty! Somehow it appears that people can’t buy a pattern and say that it was anything less than stellar without being branded some kind of hater.
Very pretty fabric! Great save too. Looks like you had a lovely lunch and a lovely photo shoot!
I love that the birds spoke to you. Cheeky fabric is the best kind. Nice save on the awkwardly placed tail feathers, as well.
gorgeous skirt and great spot for a photo shoot. I’m always boggled when a pattern doesn’t have facing understitching. I looked all over the spotlights in Qld (and one in NSW) for that fabric in that colour way – the pale blue and green were just not as nice. I had a Colette Hawthorn peplumy top with red buttons in mind ;o)
I’m not a fan at all of the Miette skirt but your version rocks. I really like it without the ties. Your bird decapitation made me laugh, but glad the pockets saved the day, they look great. Lovely pics too.
great skirt – love the fabric, it’s cute without being twee! And can I say I appreciate your honest comments re: the pattern designer and the instructions? Most people completely fawn over her which baffles me no end….
Of course you may say, and I know exactly where you’re coming from, I’m baffled too 😉
Oh, thank you both! I thought I was the only one!
Good save/camouflage with the pockets, although they are such good pockets! Your photos make it look like summer (sandles and no stockings), evening though it is still clearly winter, brrrrr, maybe I just need to harden up!
I was trying to channel summer 😉
Haha I love your “disclaimer” at the top and the tongue-in-cheek pose at the end! Made me chuckle. 😉
(Also, I had no idea you were taking that ‘behind the scenes’ photo! Or that my hair matched my dress yesterday. Funny.)
Happy to play photographer any time – ’tis fun, and good practice. 😉