Project Safety Dog Vest

My workplace is very dog friendly.

Meet:

Nessie, Tom, Tess
Bobbie, Ted & Bear

Some of these dogs are such frequent visitors they even have their own sign in!

You might all have thought I’m a cat person but I’m a sucker for a cute anything really.

Ted’s mum sits beside me so Ted is like my adoptive dog and he’s a real sweetie. He has some cute little coats to keep him warm and dry (see above) but since we are in the construction industry I decided he needed a proper H&S Hi-Vis Vest, for site visits of course.

I found a free dog vest pattern online from The Spruce Crafts and scaled it down on the photocopier to approximately Ted-sized. He’s a Griffon and won’t grow much bigger.

I had an old hi-vis vest from my time working in Western Australia. It’s a size small and fitted me perfectly…then they changed the rules and decided that a size small was actually far too little fabric coverage to be adequately seen on site. If I wanted to wear a nicely fitted hi-vis (you know, one that wouldn’t present a catch or trip hazard) I’d have to buy a new one with a long apron at the back to add more surface area…or wear a larger size. So I put my illegal hi-vis away and work bought me a new one.

Well waste not, want not!

I pulled it out and began to unpick it. I wanted as much orange fabric as possible but also decided to save the reflective tape, the edge binding and, while I was at it, why not the Velcro too?!

Harri is a bit chonkier than Ted but she made a good test model…she wasn’t particularly impressed but she trusts me…we’ll see if that pays off for her later…

I had plenty of hi-vis to work with, the vest fitted on the back piece easily with fabric to spare.

I trimmed the reflective tape a bit thinner to remove the old needle holes and bring it more in scale with the dog vest proportions.

The binding was the trickiest part to sew on but I just took my time. It’s was the nicest way to finish all the raw edges.

Next I finished the ends of the straps…

…and added the velcro.

Soft side towards the tummy to prevent accidental fur snagging!

All done!

I was super proud of it and Ted’s mum loved it too.

Harri, who trusted me, not so much…

We know a picture is worth a thousand words but really a video is so much better…

Yeah I’m not sure how I survived that either…

What did Ted think?

So safe!

So visible!

Here are a few more details:

Always sign your work…

THE DETAILS:

Pattern – Free Small Dog Coat pattern from The Spruce Crafts, scaled to suit

Next time I’d add a button hole for the dog lead to pass through.

Fabric – Old “illegal” hi-vis vest

Other notions – Re-used Velcro, binding, reflective tape


Tiny Reebok Nano 2.0s

For Father’s Day this year I made a tiny pair of Reebok Nano 2.0 shoes for a very special CrossFitting Dad-to-be.

Now the first thing you have to know about CrossFitters is that they take their shoes VERY seriously…also they’ll own several pairs. One of NH’s favourite CF shoes is his grey and blue Nano 2.0’s that we bought from the Reebok store in Las Vegas.

Before it occurred to me to try making them myself I was going to buy a pair of tiny baby sports shoes from the shops but not only were none of them CF enough they were also super expensive. Way too expensive for babies that lose things…then I remembered that a while ago I bought a pack of patterns for adult soft shoes/slippers and it also included…BABY SHOES!

The pattern I selected is the Kath Baby Shoe by ithinksew. I like this pattern because it has a separate pattern piece for the toe cap which is most like the original shoe and I could sew it with blue inside and get a little hint of extra colour.

I had everything I needed in my stash which was great because as soon as the inspiration struck me I just got started.

I added a black overlay to the soles with top stitching and some extra blue stripes to look like the soles of the grown up shoes (picture coming later…)

The inside of the Nano 2.0s is blue so I cut the tongue out in grey and blue. Then I made a tiny black tag and used red stitching to create the Reebok delta logo.

I drew this on butter paper first and then stitched over the top. After carefully ripping away the butter paper I pulled all the threads to the back and tied them off.

It was really tricky to stitch accurately and I ended up having to make three of them before I ended up with two that were similar enough to each other to use.

I cut the shoe upper and toe cap two toned as well and I found the perfect sized eyelets in my magic Box-of-Everything. I briefly contemplated how to colour them blue but nothing I had on hand would have been permanent.

The retro “swoosh” was the most time consuming part to recreate. I stitched this on before stitching the CB seam.

I started with a black outline, stitching over butter paper again. Then after ripping that off  I filled in the outline with a white zig-zag. I thought it looked pretty awful at first but I just kept filling it in more and more and now I think they look ok…

Attaching the soles was the last step before a turning them right side out and a tiny bit of hand sewing to close.

The pattern instructions we’re…ok. Prior sewing knowledge definitely helps you get through the written instructions and a few more photos would have been nice.

The whole thing was pretty fiddly due to the size of the pattern pieces and of course you do everything twice! The seam allowance is just 1/4″ so I used a quilting foot instead of my regular foot as a guide.

Now, shoes need a shoe box!

The original 2.0 box looked like a red sea container so I printed striped paper with the Reebok and CrossFit logos and cut them up to wrap the box.

In keeping with the “I didn’t buy anything new to make these” theme I went hunting for cardboard in the recycling bin…If there are any CrossFitters reading this you will understand the inside joke that of course the only acceptable cardboard to use was from a La Croix box…I guess FitAid would have worked too but this one was handy.

Hint of hint of Lime flavour.

And here they are…

A narrow grey Petersham ribbon worked great for the laces.

And let’s just say CrossFitting Dad-to-be was super surprised (mostly because baby isn’t actually here yet) and also because they are pretty awesome.

I am super proud of them.

Now Baby and Daddy can go to CrossFit with matching shoes!

THE DETAILS:

Pattern – Kath Baby Shoe by ithinksew, size 2 (3-6 months)

Fabric – Grey drill, various coloured cottons, eyelets, Petersham ribbon, thread

Surprise Wrap Dress

Have you ever finished a make and after trying it on thought, “ugh, this makes me look pregnant!”? I have a few times but now I have an excuse because I AM pregnant!

Surprise!I wrote most of this post a few weeks ago for the Singer Aus/NZ blogs when I was about 24 weeks, which was just about when my wardrobe choices had started to take a serious hit!

I lost two of my favourites, the Papercut La Sylphide (sadly now OOP) and Colette Rooibos of which I’ve made multiple versions, at around 19 weeks when baby decided to expand his residence upwards above my natural waist line.

8 dresses down, let’s keep going…

My So Over It Betty dresses and Vogue 1353s lasted a little longer due to the slightly higher waists and full skirts but ultimately I retired them around 23 weeks.

That’s 5 more gone! What’s left?

So I’m down to my Pauline Alice Cami dress, which is lasting only because it too has a high waist, gathered skirt and it was too big for me anyway, Kitschy Coo Lady Skater (yay for stretchy merino) and Papercut Clover dress which is great worn with a high belt. I only ever made one each of these dresses.

Well that’s clearly not going to cut it is it? I need some new dresses ASAP!

I’m not looking for maternity specific patterns, my sewing time is precious and everything I make get emotional investment so I don’t want to have to shelve them after baby arrives in December so I’ve been hunting out patterns that will still suit me postpartum and beyond, maybe with a few modifications.

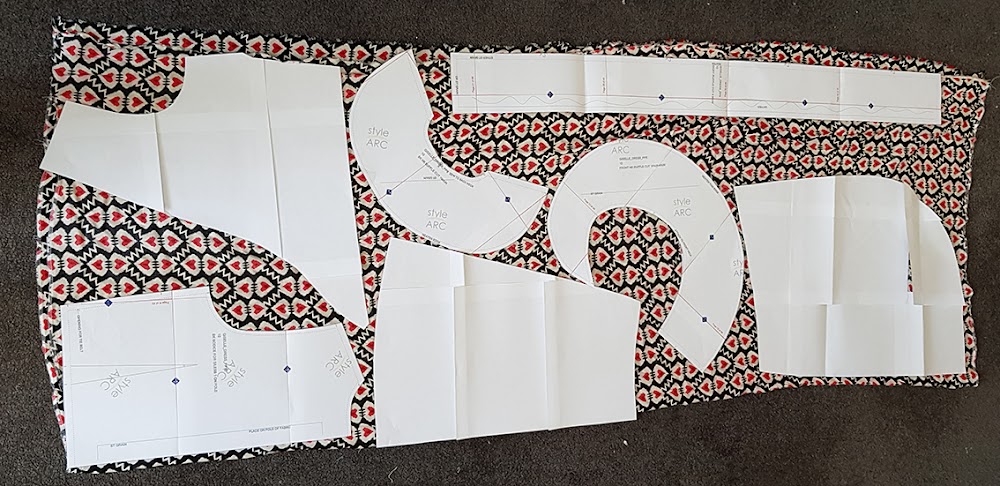
What better place to start than the stash, let’s take a look:

So as well as making another Lady Skater and Clover dress my short list is:

Republic du Chiffon Violette Dress (cheating: I bought this one recently!) – Victory Patterns Simon Dress/Top  ⁣- Papercut Saiph Tunic

Victory Patterns Hannah DressSew House Seven Tea House Top and Dress
Milan AV-JC Zero Waste Brumer Wrap Dress

I’ve also bought two maternity specific patterns because stretchy fabric is life right now and also they look so cute and fast to make:

Deer & Doe Givre Maternity version – Megan Nielsen Erin Maternity Skirt

With so many baby things being quickly added to my sewing queue I’m unlikely to get to all of these but dream-sewing alongside real-sewing is a fun way to pass the weeks.

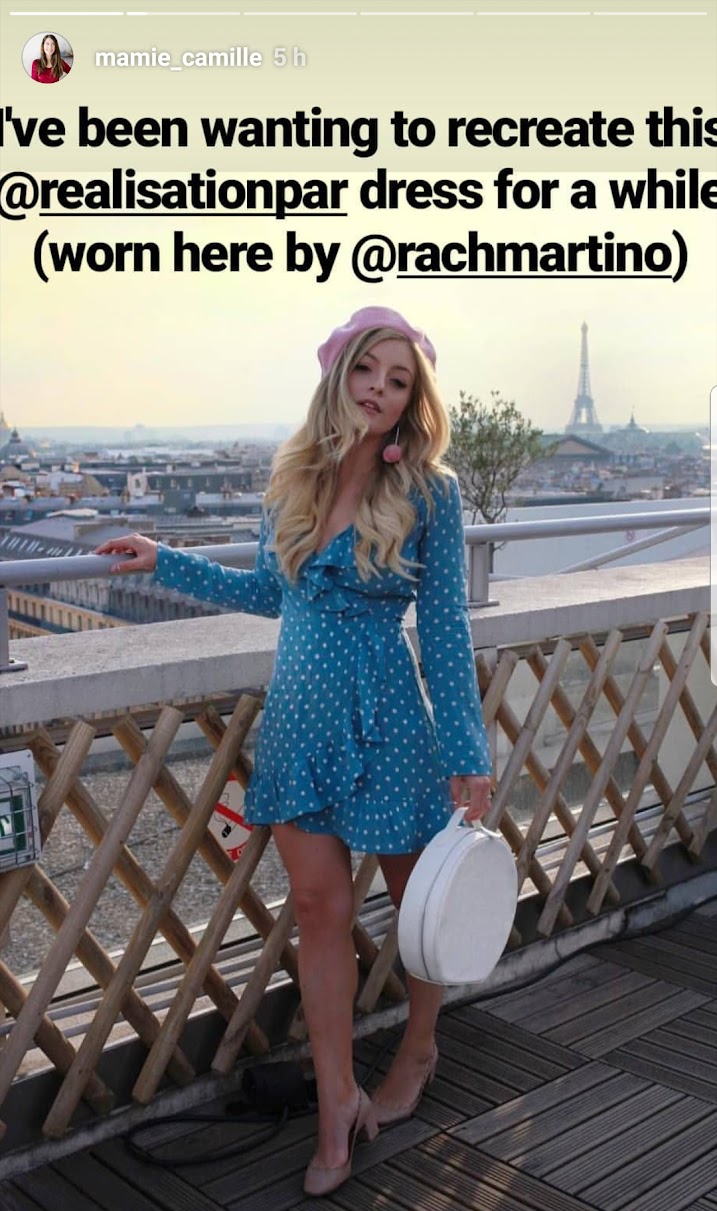
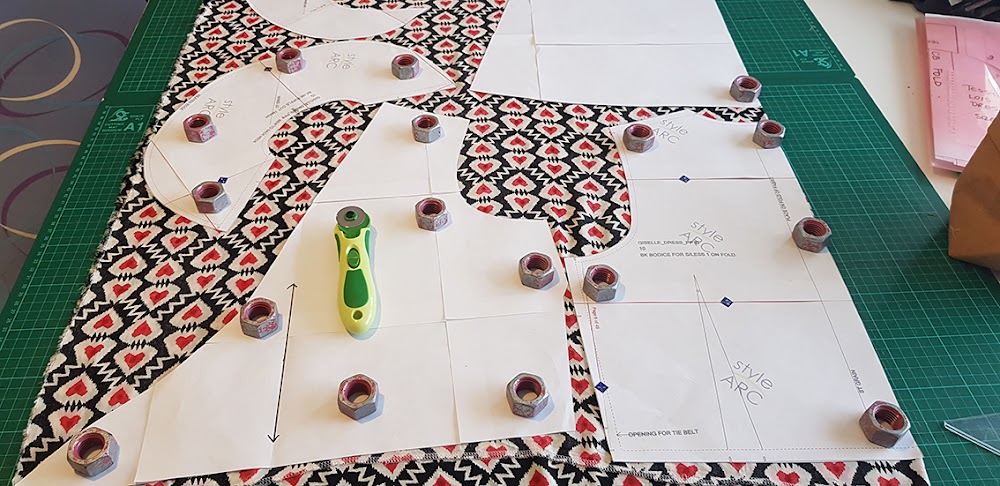
For my first experiment into Maternity-But-Not-Really-Sewing I’m going with a wrap dress that’s been on my to-sew list for ages. It’s vintage Vogue #1679 Diane Von Furstenberg wrap dress⁣⁣. This pattern is single sized, unfortunately one size too big for me, but with the general overall body expansion I decided to sew it as drafted and see how it turned out. Later I can grade this pattern down a smaller size or two.

It did turn out a tiny bit big for me but it’s been a while since I sewed from a vintage pattern and I really enjoyed it.

This dress is really well finished with full length interfacing on the bodice and skirt edges, full length facings, lots of stay stitching (I used fusible stay tape instead) and beautiful clear instructions.

Trying my best to match up the stripes!

Stay Tape along the top edge of skirt

Left: Can you see my centre back seam?
Right: Setting in sleeves with the Many Many Pins technique

I only made two changes from the instructions: No hand stitching for the wrap pass through, because a.) hand sewing, and b.) you won’t see it (it’s covered by the wrap ties), so I machine top stitched around this instead. And I continued the edge stitching from the bodice right down the skirt because I liked it.


I also won a game of bobbin roulette but almost lost entirely when I noticed I was running out of thread completely. The original spool was from a big box I was given by a family friend who had sewn curtains in a past life. This means most of the colours are multiples of beige and cream but there are a few brights in there that I’ve managed to use.

I originally took a photo of the old and new spools of thread thinking to illustrate that Gutermann had changed their colour numbers or NZ had different numbers but a quick internet search of their colour chart showed me 912 AND 247 looking very similar so it’s actually just that my local Spotlight apparently doesn’t bother to stock all the colours…I met their Gutermann rep once

Winning Bobbin Roulette 

Let’s see how it turned out:

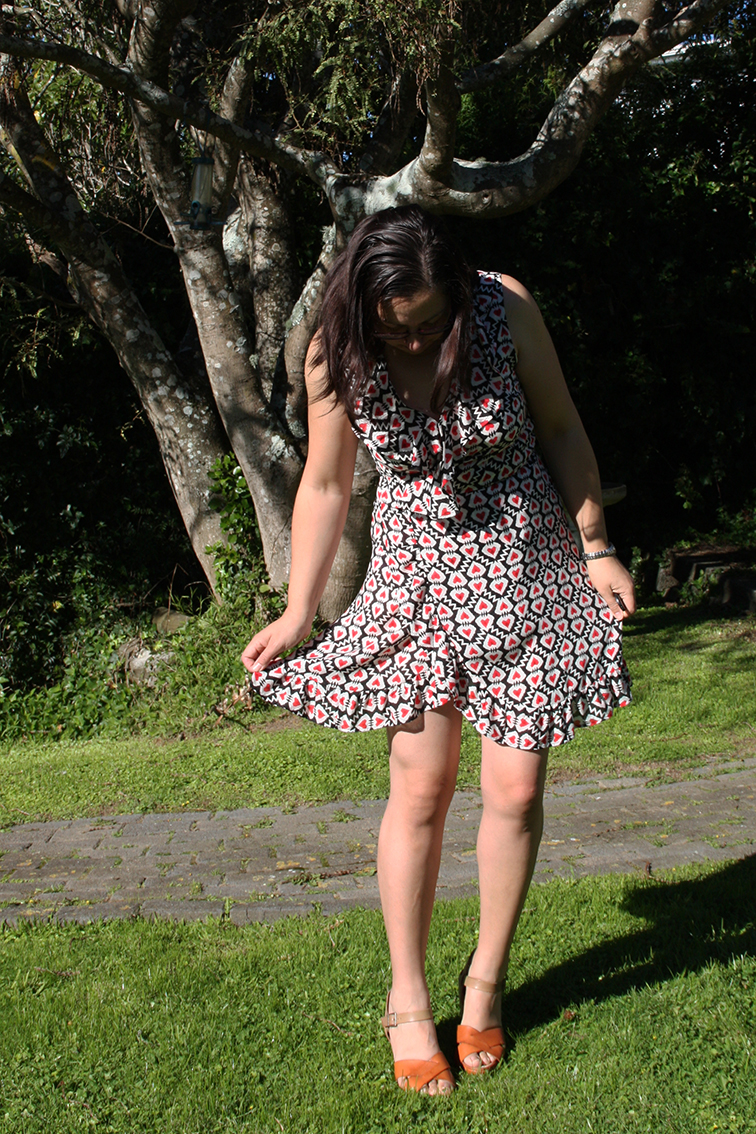
The front wrap has great coverage, crossing right over to the opposite side seam. Great on a windy photo day!

I spent a lot of time while laying out this pattern to get good stripe matching and no twinning on the bodice. I think I did pretty well, the stripes continue up seamlessly.

The skirt has quite a curved hem so it looks a little wonky inside out but when worn it’s fine.

Inside out you can see the nice wide facings, all under-stitched, interfaced and stay taped so that they lie against the body really nicely and won’t stretch out.

I only overlocked the edge of the facing (in magenta of course!), all other seams are left unfinished. This fabric won’t fray and it makes for a nice soft interior.

The extra finishing steps were really worth it to help this dress last as long as possible and make it comfortable to wear. I really enjoyed sewing this one and I definitely see a couple more in the future. Stretchy fabrics and I are best friends right now!


THE DETAILS:

Pattern – Vintage Vogue #1679 Diane Von Furstenberg wrap dress (OOP), view A, size 16 1/2 (Bust 99cm)

I chopped quite a lot of length off the skirt pattern pieces. Next time grade down 2 sizes.

Fabric – Knit from The Fabric Warehouse


Lonely Hearts Giselle

When I first finished this dress it was a rainy autumn day in May. I put it on and wasn’t immediately sold.


I had found the final instructions for finishing off the ruffle and waist tie frustratingly lacking and so I wasn’t in the best mood. I told myself to wait a little bit for some sunshine and then try again because this fabric is a little bit special.

In 2013 Arthur Toye, an NZ fabric institution with stores all over the North Island (maybe the South too? I’m not sure) announced suddenly that they were closing down.

Every.

Store.

I was devastated. I’d been buying fabric at ATs for as long as I’d been sewing. They had an amazing selection of fabric at decent prices, all the major pattern brands and notions, and they were in the middle of the city. The staff always took the time to create interesting displays and the store was always tidy. Sometimes I’d just go there in my lunch break to be inspired, pet the fabric and then head back to work. They also had regular amazing sales!

After the Wellington store closed I was heading through Palmerston North with my sister to visit our Dad and we saw that their store was still open. We popped in on our way back and both bought a length of this amazing heart printed Rayon.

If this fabric looks familiar it’s because you’ve seen it before on my blog. In 2014 some of the Wellington Sewing Bloggers teamed up to make Megan Nielsen’s Tania Culottes.

And because Fashionable Younger Sister’s name is Tania we made her join us, even though she lived 650 kilometers away in Auckland:

Mine went into my stash for a bit more “maturing”. I still have a lot of AT fabric in there but one day, and I admit that day is a long way off, I’ll pull out the last piece of Arthur Toye fabric.

That day will be a very sad day.

The StyleArc Giselle dress pattern caught my eye after I Camille shared a similar Realisation dress on her Instagram story.

I decided I needed a fluttery summer dress and the hearts rayon called out from the shelf. That’s how fabric maturation works, you just have to listen carefully 😉

This was my first StyleArc pattern and having already been pre-warned that the instructions were minimal I thought I knew what I was getting myself in for…There was no cutting layout but you guys know by now that I’m totally fine with making that up on my own!

I also had my supervisor at the ready.

The fabric estimate stated I needed 2.5m and I only and 1.7m. It was a tight squeeze but with a bit of piecing I managed to get everything out of my short length.

I don’t remember why I bought such a random length of just 1.7m (2.0 or 2.5m is my usual go to when I’m just stash bulking), I suspect it was the end of the bolt after FYS’s length was cut off.

And then I realised that I hadn’t cut enough binding pieces so all the scraps came out of the bin and I pieced even more bits together!

Despite the short instructions there are some nice details in this pattern. Binding finishes all the raw edges…mostly nicely. I recommend under-stitching before you topstitch this down.

The longest part of this make was finishing the edge of the ruffles. They are so long and it’s a little fiddly.

This was second only to gathering the skirt ruffle. It was an even looooonger pattern piece but with a little patience, I got there in the end. The nice thing about the ruffle is that after it’s sewn on there is no need to hem the skirt, suddenly the dress is finished!

The sour note at the end was the interface between bodice binding, waist seam and waist tie…it’s just not very refined and it was a let down to finish the dress off on such a fiddly and poorly thought out detail.

I ended up fudging it a little and it’s not too bad I guess…

So, after two weeks of waiting for some better weather, I am glad to say that in the end I liked my new dress more. It’s a much lighter and shorter style than I usually wear but it’s very summery and the ruffles are fun.

Winter was very much on its way however so the Lonely Hearts Giselle will be waiting until Summer 2020 for it’s next outing.

I think we’ll go to the beach together!

THE DETAILS:

Pattern – StyleArc Giselle Dress,  variation 1, size 10

No alterations

Fabric – “Vintage” Rayon, 145cm x 1.7m from Arthur Toye Palmerston North, purchased 14 November 2013, $24.95 – 50% off (closing down sale)

I’ll leave you with a fun pic from a weekend sewing session: We have a small sewing group at work and we usually meet once per month to sew in our office staff hub. I’m slowly enlarging the group by teaching anyone who is interested. My current students are Sarah and Sovaia who are both making the Papercut Pattern Ravine Dress. How gorgeous are the colours they chose? They’re both really close to finishing now!

It’s never too late to learn to sew!